I’ve had an concept for a very long time now to combine a develop field that may each domesticate mushrooms and hashish concurrently. Subsequently, I made a decision to make the most of AI to provide you with a theoretical field that would obtain this course of.
The next weblog submit will concentrate on this discovery. Certain, I can horde it for myself and construct it, then promote it, however I’m additionally an avid proponent of open-source and regardless of me having the ability to innovate and construct the field, I wish to give anybody else who has the curiosity and the financial means to construct their very own.
So on this submit, I’m giving all of it away.
Sit again, pack a bowl, let’s construct a field that may give you infinite weed and infinite mushrooms.
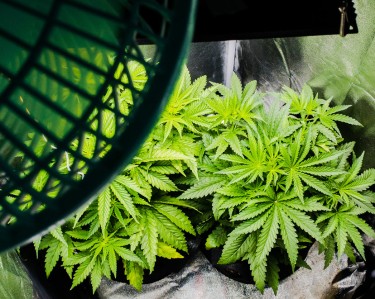
Let’s start with the fist side, Supplies and prices. On this phase, I’ve considered that you simply need to have a field that may develop no less than 4 crops. This fashion you’ll be able to basically get a couple of pound or so per harvest. This could give you sufficient weed till the subsequent cycle.
Moreover, you probably have a sprouting chamber on the backside of the develop field, you’ll be able to technically maintain the harvest coming as one is harvested, the subsequent one can begin their cycle.
The mushrooms takes roughly 21 days to fruit, that means per thirty days you are able to do a single harvest whereas the hashish will take roughly 4-6 months relying on while you change into the flowering cycles.
The mushroom harvests might be most necessary in the course of the flowering stage of the weed cycles because the pure byproduct of mushrooms is CO2, which we all know will assist your crops develop greater and stronger.
Subsequently, you’ll need to plan your cycles accordingly
Nonetheless, right here’s a breakdown of the supplies I estimate you’ll want and the approximated prices related to them. If yow will discover these supplies cheaper or go dumpster diving to search out comparable items, you’ll be able to drop the price of the manufacturing considerably.
-
4×8 Hydro Desk: $100 – $200
-
Trellis Netting: $10 – $20
-
Reservoir Tank: $50 – $100
-
Submersible Pump: $30 – $50
-
Drip Irrigation System: $20 – $40
-
Air Stone and Air Pump: $20 – $30
-
Develop Lights: $200 – $500
-
Nutrient Resolution: $50 – $100
-
pH and EC Meters: $20 – $50 every
-
CO2 Tank and Regulator: $150 – $300
-
Rising Medium (e.g., Rockwool, Hydroton): $20 – $50
-
Seeds or Clones: $10 – $50
-
Local weather Management (Humidifier, Dehumidifier, Heater, AC): $100 – $500
-
Timers and Controllers: $20 – $50
Estimated Complete Price: $800 – $2000
Now, let’s take a more in-depth have a look at the construct and arrange of this field. This can be a common information and naturally, theoretical – nevertheless, in the event you perceive the fundamentals of the right way to assemble this field, you’ll be successful!
Within the following part I’m masking the essential steps, with out an excessive amount of element as a result of I’m not the perfect builder myself. I’d in all probability attain out to somebody who is aware of how to do that higher than me, nevertheless take into account that this may even improve prices particularly in the event you pay them. The DIY builder can use this as a base for their very own construct. So observe these directions and see the way it goes.
-
Hydro Desk and Reservoir Setup:
-
Place the 4×8 hydro desk on a sturdy stand or body.
-
Place the reservoir tank beneath the desk.
-
Set up the submersible pump within the reservoir.
-
-
Drip Irrigation and Trellis Netting:
-
Join the drip irrigation system to the pump. Prepare the drip strains throughout the hydro desk to make sure even water distribution.
-
Set up the trellis netting above the desk to assist plant progress.
-
-
Air and Water Circulation:
-
Place the air stone within the reservoir and join it to the air pump. This may oxygenate the water.
-
Arrange the water circulation system in order that the nutrient resolution is recirculated from the reservoir to the crops and again.
-
-
Lighting and CO2 System:
-
Hold the develop lights above the hydro desk on the beneficial top on your crops. For lights, you’ll in all probability need to use LED to scale back the warmth for the mushroom cultivation that might be on prime of the field.
-
Arrange the CO2 tank and regulator to enrich the rising space with CO2. Guarantee it’s timed with the sunshine cycle. That is an addition, nevertheless, in the event you’re rising mushrooms, it ought to substitute the necessity for this tank.
-
-
Local weather Management:
-
Set up mandatory local weather management units (humidifier, dehumidifier, heater, AC) to keep up optimum rising situations (81°F, 55% RH).
-
-
Timers and Controllers:
-
Use timers to automate lighting, irrigation, and CO2 launch cycles.
-
Set irrigation to water 26 occasions a day for 15 seconds every.
-
To handle the warmth generated by the develop lights and guarantee it would not intrude with mushroom improvement, you’ll be able to implement a couple of methods:
-
Insulation and Separation: Create a well-insulated barrier between the mushroom compartment and the hashish develop space. Use reflective and insulating supplies to forestall warmth switch.
-
Air flow: Set up separate air flow programs for each compartments. Use followers and ducting to take away extra warmth from the hashish develop space and keep a cool atmosphere within the mushroom compartment.
-
LED Develop Lights: Use high-efficiency LED develop lights that produce much less warmth in comparison with conventional HPS or MH lights. Guarantee correct spacing between the lights and the crops to additional cut back warmth buildup.
-
Lively Cooling: Implement lively cooling programs comparable to air conditioners or water-cooled lights to handle the temperature within the hashish develop space.
These components might be crucial in guaranteeing that you’ve harvest of mushrooms. You’ll additionally need to run a duct from the fruiting chamber of the mushrooms into the develop field. You too can have one other extractor fan that may ship the O2 generated by the weed into the fruiting chamber of the mushrooms.
This closed system ought to permit your mushrooms to develop greater in addition to your weed.
On the finish of the day, that is one thing I’ll in all probability construct over the subsequent 12 months. I’m residing in a residential space and have a house workplace, subsequently, having a develop room in the home could be ultimate, particularly since I don’t need my neighbors to know what I’m doing.
Proper now, I’m simply making ready myself for it, getting the mandatory objects to make sure that the system works. When I’ve it constructed, I’ll revisit this weblog and replace it accordingly.
For now, I hope I impressed a few of you to consider making this multifunctional growbox and hopefully you’ll be able to construct it as properly. For those who’d wish to collaborate and focus on, shoot a message to my editor who forwards me all these feedback and let’s discuss!
GROWING WEED AT HOME, READ ON…

HOW TO SET UP A WEED GROW AT HOME FOR $50 OR LESS?